Posted on 2 Comments

Creating in the dirt! Check out our Bean Tepee

Grow a Bean Tepee, a fun yard project for all ages.

After 2 months the beans were growing!


It started in March 2020 with 12 one-gallon pots, some dirt, and an assortment of bean seeds.

We placed 12 pots in a semi-circle

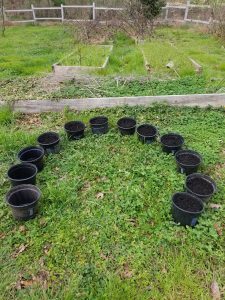
We placed the pots in a semi-circle rather than digging up the yard.

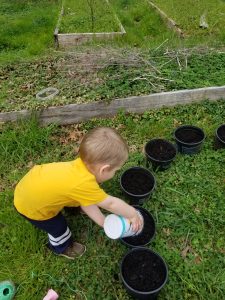
Add one very helpful toddler, a large bag of dirt and we were in business.

Leo added 4-5 pre-soaked bean seeds to each pot

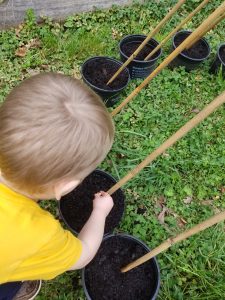
We added bamboo for the beans to climb on, then the pre-soaked seeds were carefully planted.

Leo carefully planed the seeds.
Leo loved being in charge of the seeds.

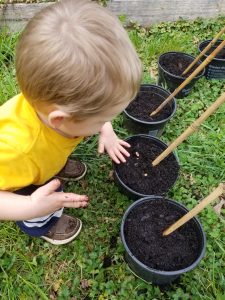
Leo loved being in charge of the beans. So some pots had more than others. We planted Purple Beans, Pole Beans, and Stringless Green Beans.


He loved being inside the tee-pee but really didn’t understand what we were planting.

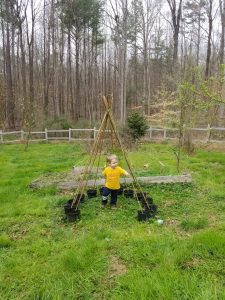
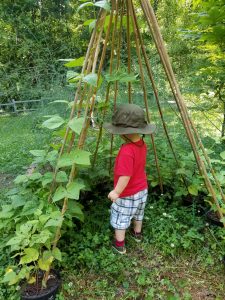
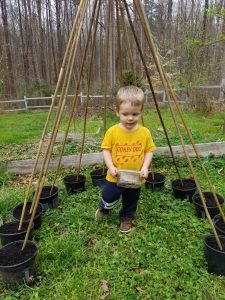
So fun standing inside the tepee!

And a selfie after out planting was finished. Now for them to grow!!

After 2 months the beans were growing!

Fast forward two months and the beans are climbing up the poles! (We did add twine between the poles to help the beans to climb).

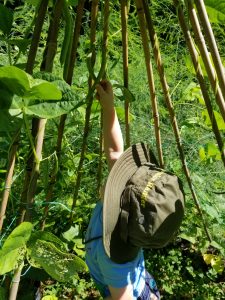
Another month of growing and some of the beans were ready to be picked!!

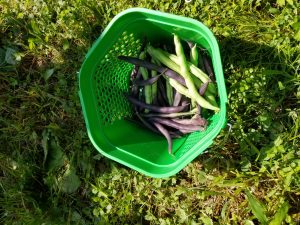
Look at all of the beans we picked!!

Washing beans, hands, shirt, sink, and floor are all very important.

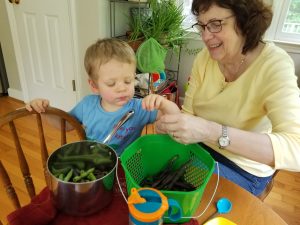
Then we snapped the beans, and pot them in a pot.

Leo is a great helper!

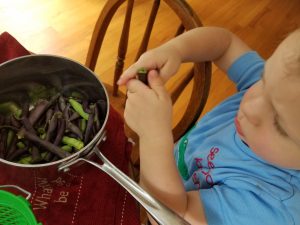
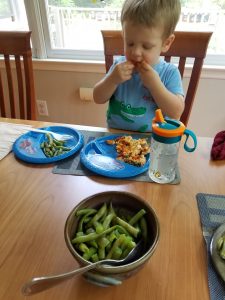
To our surprise, the purple beans turned green when they were cooked! They were YUMMY!!

Posted on Leave a comment

Checkmate!

Someone in our family was having one of those birthday’s with a “0” in it, and is also a little hard to shop for. The idea of a vertical chess board came into the conversation. We had looked at one on a web site, but it was pretty expensive, and thought, can’t we make one?

Vertical Chess Board D.I.Y

We started with a 40% off coupon at Michael’s, and found a 18″ x 24″ shadow box

We were in the process of having new flooring installed, and I asked our “flooring guy” Jimmy if he could help get the “shelves” needed and put them in place for me. But first I had to break out the glass in the frame, because it was secured to the front of the frame, not just placed in.

You have heard the saying measure twice, cut once? We measured at least 4 times, to make sure the shelves were the right size and distance apart.


Jimmy also put small spacer pieces on each side to help hold the shelves in place, and give the shelves stability.

Next the shelves were spray painted black.

The back of the shadow box was a soft foam board. It was measured off, and painted. We didn’t have to worry about the lines being exact, because the shelves would cover the top and bottom of the painted squares. Because the back was soft, it did absorb quite a bit of paint.

We found a set of Super Mario Chess pieces, which just added to the fun of this board.


Posted on Leave a comment

Learning Opportunities are the Best!

This is what can happen when you are always distracted by something shiny and sparkly, and have trouble focusing at times. It’s also when happens when “someone” tries to organize your craft supplies and puts the wrong cap on the cans of spray paint (because you are still using the spray paint, and leaving the cap off saves time, right that’s it), its about saving time.

20170318_140413_1489872875222_resizedI have been collecting and painting pine-cones for several weeks, and this was the day to finally put them together in a wreath.

20170318_140423_1489872873329_resizedI covered a wire wreath form with burlap ribbon, so the pine-cones could be glued on, knowing the wire form would give the wreath the stability needed. After all of the pine-cones were hot glued in place. I took the wreath outside to give it a coat of clear spray paint to add a shine and help preserve the project. I also had a burlap bow ready to place in the center. And that’s when it happened…..20170318_173329_1489872869366_resized

The “CLEAR” spray paint can with a CLEAR lid, was actually BLACK paint. Luckily I started on on side, so only a few pine-cones got a spurt of black. Yes I know I could pull the miss-pained cones off and replace them, or repaint them, but decided it was okay in the end, and it does make me laugh when I see it hanging on the door.

20170318_173322_1489872871558_resizedThis is not a mistake, it’s a learning opportunity! I will ALWAYS check paint before spraying a project in the future.


Posted on 2 Comments

Re-purposing Nature

Pine cones 10After seeing friends paint pine cones to look like Zinnia’s I was inspired and intrigued. A box full of old wooden picture frames seemed to be calling for a craft project as well.

Pine cones 1We picked up pine cones, large and small and baked them in the oven at 250 for about an hour (to kill and bugs or critters, and to help the pine cones open up).

Pine cones 2The pine cones were then cut (since we only used the bottoms)

Pine cones 4We thought we could use the tops as well, but when they were pained, they became very distorted. So only the bottoms were used.

Pine cones 5We used acrylic paint (rather than spray paint) dipping the pine cones into the paint and letting them drain and dry.

Pine cones 6We used red, yellow, pink and orange colored paint.

Pine cones 8Then we took an old wooden 8″x10″ frame and wrapped it with burlap ribbon.

Pine cones 9


A strip of ribbon was added so that the “flowers” could be glued across the corner of the frame.

Pine cones 10A fabric bow was attached and a saw tooth hanger (on the back) We also added a few silk leaves (from another project back in the fall) and there it is! Nature at it’s best!


Posted on Leave a comment

A few crates, some carpet, rope & nails = Crazy Cat Crate

Using a few crates, carpet samples, rope and some nails, these items were all re-purposed into a crazy Cat Crate in a few hours. 20170204_175213_1486257646387_resized


We were going to recycle the blue tube as the scratching pole, but it wasn’t tall enough. We substituted the tube with tomato stakes. 20170204_115146_1486258151618_resizedFirst we stained the crates with a pet friendly stain, and covered the flat board with a carpet sample (using a staple gun).

20170204_125918_1486258080519_resized

20170204_163020_1486258077096_resized

20170204_164254_1486258074722_resizedThen it was time to assemble. Nailing one crate to the carpeted piece, and the top crate in place.

20170204_172234_1486258030367_resizedWe cut tomato stakes to fit as the scratching posts and covered them with rope, using a hot glue gun to hold the rope in place.

20170204_170406_1486258035610_resized

20170204_170707_1486258034010_resizedThe scratching posts were nailed in place, and another carpet scrap was placed in the bottom….hopefully the cats will like it!

20170204_175124_1486257648883_resized20170204_175213_1486257646387_resized


Posted on Leave a comment

Do You Want To Build a Snowman?

20170106_153445_resizedSorry, but I just had to do it, as it is actually snowing in North Carolina as this post is being written. So with that in mind, I thought the door needed a snowman wreath. I started with 2 metal wreat forms, a 6″ and a 12″, and two spools of tulle. 20170105_183444_1483734987844_resized

I wrapped the wreaths with baby blue ribbon, but white would have worked just as well. Then cut 60-18″ pieces of tulle for the large wreath, and about 40- 16″ pieces of tulle for the smaller wreath.

20170105_185519-1_1483734990192_resized

Using a half lark knot, I then started attaching the tulle to the two wreaths.

20170105_191557_1483734992169_resized

After finishing the larger wreath, then I started on the smaller wreath.

20170105_195552_1483735030497_resized

After both wreaths were finished, then I used a piece of white coverd wire to atttach the two wreaths together.

20170105_201551_1483735033054_resized

And with that I had a Snowman! I first tried adding a ribbon bow tie and a “hair” bow, but wasn’t that thrilled with the outcome. So then I found one of my daughters hat and scarf sets from MANY years ago, and pinned them on instead.20170105_202156_1483735035198_resized

A little wire to attach it to the door, and there it is, a Snowman!

20170106_153445_resized

Posted on 10 Comments

Bandana and Fabric Wreaths

After seeing a “pin” on Pinterest of a Red, White and Blue Bandana Wreath, I thought it might be fun to make one! Then to take it a step further, I thought, why not use pieces of fabric to do wreath instead of the bandanas. Here are the results:

Bandana Wreath on door

Using 7 Red, 7 White and 7 Blue bandanas. Each bandana was cut in half, so the 21 bandanas actually make 2 wreaths.

20160516_160711_resizedUsing 11 Fat quarters that I purchased and cut each in half, I was able to get the same effect with this dog paw wreath.

Bandana Wreath 1

Here are the supplies. 21 Bandanas, and a wire wreath. Bandana Wreath 2

The bandanas were cut in half and attached to the wire wreath with a half lark knot. Bandana Wreath 3

THe 7 Blue Bandanas were tied together, then alternating red and white, using the remaining 7 red and 7 white pieces. Glitter stars were glued in place to complete the flag look. Bandana Wreath and Vega 2

Vega really wanted to wear a bandana too and pose for a photo!20160516_141215_resized

Using fat quarters – 4 of the dark and 7 of the white. Each piece was cut in half with the salvage on the ends. 20160516_151327_resizedThey were then tied to the wire wreath with the half lark knot as well. alternating w=two white and one black print.

20160516_160711_resized

Then a bow was added made of dog print ribbon.


Posted on Leave a comment

Welcome – Flower Pot Style

Welcome – Flower Pot Style!

20160401_173514_resizedWaiting for Spring (my favorite season) is so hard! The birds are chirping, Dogwoods starting to bloom, and stores are starting to get in their bedding plants. 20160331_124502_resizedAfter seeing something like this on Pinterest, I decided to try my own. Having a “few” clay pots around, I found three pots in graduated sizes. Made numbers out of paper to trace on the largest pot. 20160331_125054_resized

Wanting to keep as much of the clay pot showing as possible. I outlined the design with Slick Paint.

20160331_150941_resized

Then filled in the background with black acrylic paint. 20160331_190446_resized

I placed the largest pot, on a pot (to been seen behind the bushes on the porch). Then started planting with assorted bedding plants.

20160331_190446_resized

Then added the second pot, more plants….20160331_191132_resized

And finally the top pot and a beautiful and unusual geranium.

I then added smaller pots to cover the “base”, and there you have it!20160401_173514_resizedIt took about an hour to paint the pot, and another hour to assemble. Total cost was around $30.00-40.00 including pots and potting soil.

Posted on Leave a comment

Merry Christmas

As we all hustle and bustle around, take a few moments to enjoy the season, and all that it has to offer!.

Each year I insist on a “real” tree, a freshly cut, formerly live evergreen Christmas Tree. One of the reasons, is so I can use the trimmed branches throughout the house and share that fresh evergreen smell.

This year, I ran out of containers and vases…..

Chrismas HatMerry Christmas and Happy New Year from Wendy Jene Creations!